How to Turn a Screenplay into a Comic Book: Scene-to-Panel Guide
Adapt the choices in your screenplay into panels, character references, dialogue balloons, and composed comic pages. Follow a worked reunion scene from script to PDF.
AD
Ankitraj Dwivedi
Co-founder and screenwriter
A screenplay may say, “Maya hesitates before handing over the compass.” A comic has to show where she looks, what her hand does, and which moment deserves its own panel. Adaptation translates that action and subtext into images while keeping the story’s choices intact.
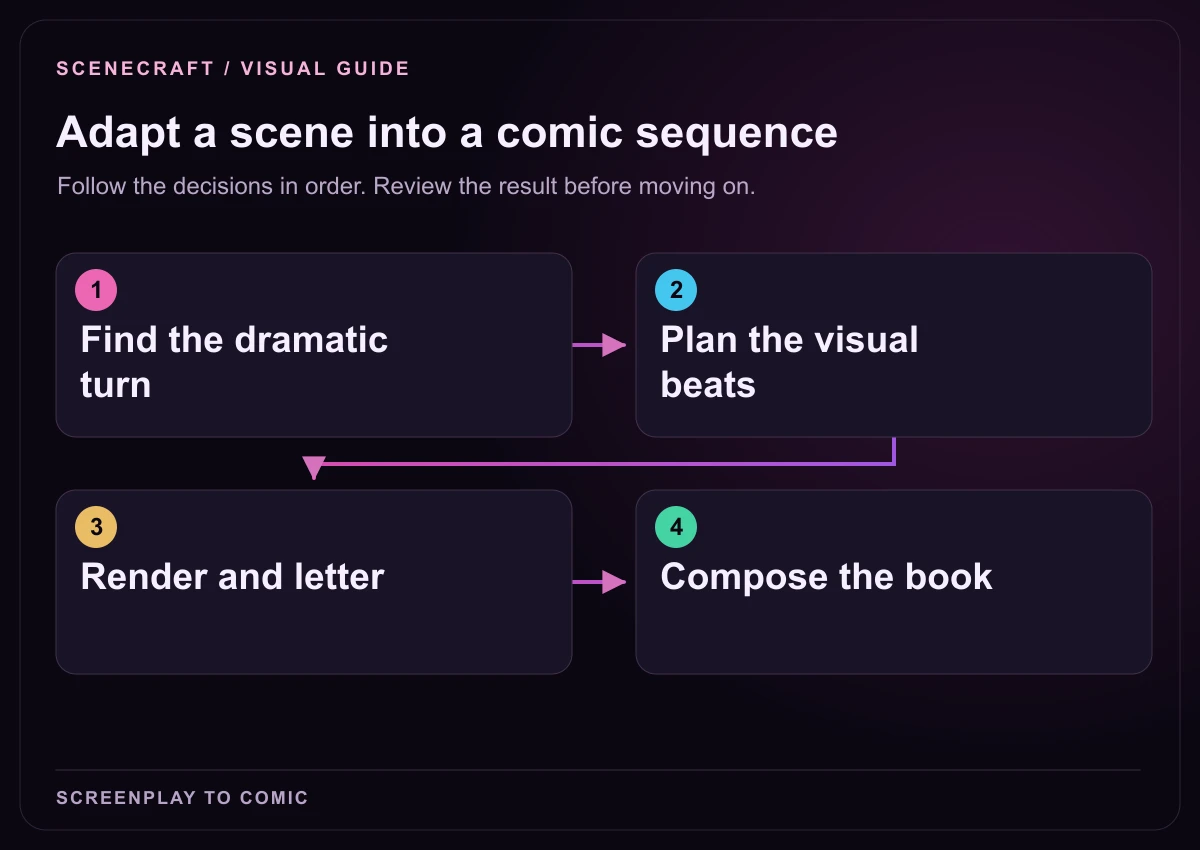
1. Find the dramatic turn: Identify what changes between people. 2. Plan the visual beats: Separate setup, reaction and decision. 3. Render and letter: Review cast, props and dialogue order. 4. Compose the book: Select composed pages before PDF export.
A scene becomes panels; panels become pages
A panel is one framed story moment. A page arranges several panels into a reading sequence. A scene can need multiple physical pages, especially when a conversation changes direction or an action sequence contains several important reactions. Deciding that everything must fit on one page can erase the pause or reveal that makes the scene work.
SceneCraft’s AI comic generator works from the scene you select in the screenplay editor. You can review the panel plan, change individual prompts and lettering, then arrange the rendered panels across pages. The screenplay remains the reference for what happens; the comic adaptation decides how readers experience it visually.
Start with a scene that has something to adapt
Open Dashboard → Projects, choose your project, enter Editor, and select a scene. Use Visuals → Comic Studio to open the Comic tab in the Scene Visualizer. You can expand the drawer for more room or collapse it when you want to inspect the script.
Add action, dialogue, or a clear scene brief before planning. A title such as “The reunion” does not explain who arrives, what they want, or what changes. Give the planner the important actions and the exchange between the characters. If the idea is still scattered across notes, develop its premise and turns with Visual Story planning first.
Comic Studio is a premium feature. Review the credit estimates before AI planning or image generation. Begin with one representative scene to assess the adaptation before creating a longer book.
Prepare the cast before you plan the panels
Choose the art model in the Comic drawer, then open Cast reference art. Each character cued in the scene needs a ready active avatar before AI planning. You can upload your own character artwork or generate an avatar from an appearance description. Describe recognizable details: face, build, hairstyle, wardrobe, species, and any distinguishing feature the story depends on.
Use AI look or Auto-write all looks with AI for a starting description, then edit it. The active avatar is shared with the Characters tab, Cast Bible, and future comic renders. You can select a previous avatar from its history.
Add signature items when a recognizable prop matters. Maya’s brass compass deserves a stable description; a background cup probably does not. The comic character creation guide explains how to build useful reference art. For recurring outfits and visual changes, see character consistency across comic panels.
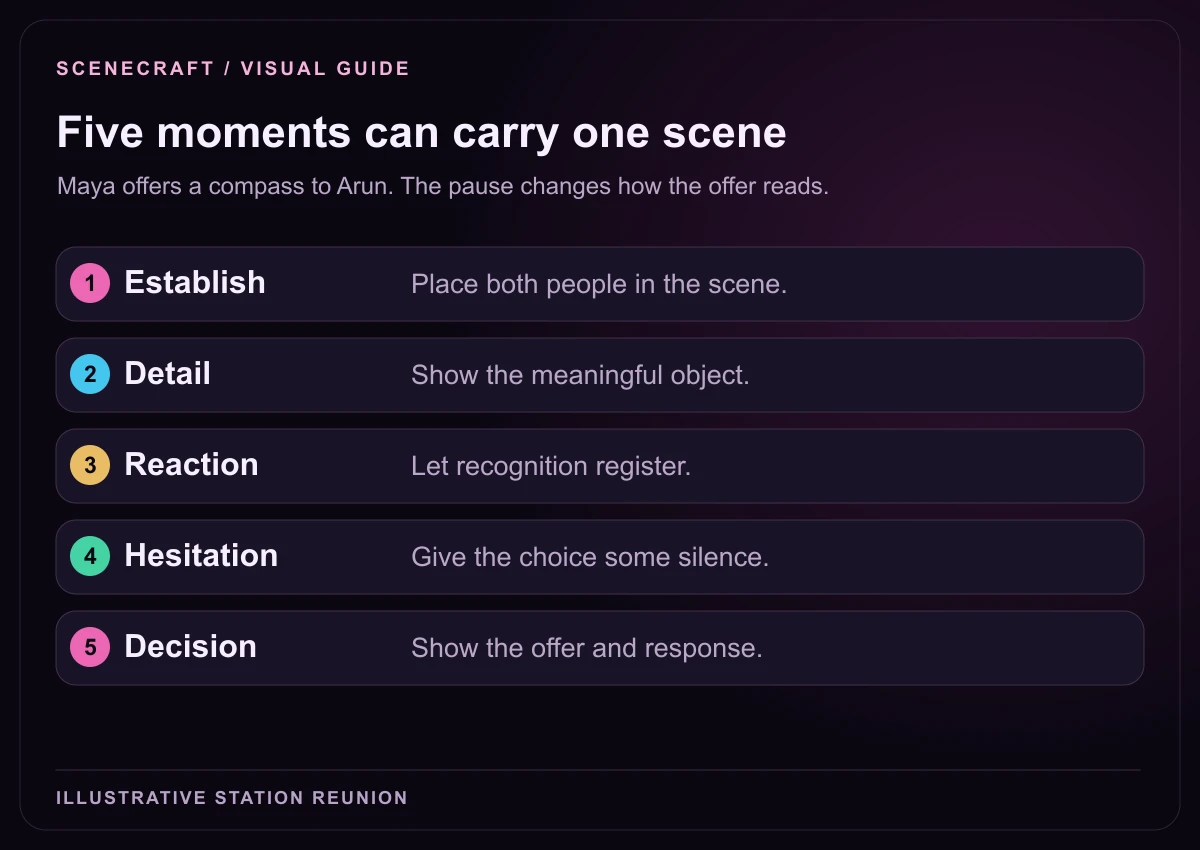
Example adaptation sequence: establish the scene → make the object matter → show recognition → let a pause register → show the choice.
Give direction that changes a storytelling decision
The optional direction field is most useful when it names the scene’s visual priority. “Cinematic and beautiful” leaves the important choices vague. “Keep Maya’s reaction silent; show the compass before Arun notices it; cool platform light with a warm lantern” tells the planner where to place emphasis.
Leave the panel count on Auto when you want the scene’s beats to guide the plan, or enter a count when you have a specific pacing experiment in mind. Click Plan comic page, then read the resulting panels against the original scene. Check the order of actions, which character is present, the dialogue assignment, and the reveal that ends the sequence.
Worked example: a reunion in five panels
Maya arrives at a rain-soaked station with the compass her brother left behind. Arun has been waiting, but she does not know whether to trust him. Maya wears a crimson coat; Arun wears a green scarf. The scene’s turning point is her decision to offer the compass, not simply their arrival at the same place.
Panel
What the reader sees
What it does for the scene
1. Establish
A wide view of the wet platform. Maya approaches the pool of lantern light where Arun waits.
Locates both characters and establishes distance before the conversation.
2. Detail
Maya’s hand tightens around the brass compass inside her open coat pocket.
Makes the object important before anyone explains it.
3. Recognition
Arun notices the compass. His expression changes; his green scarf stays visible.
Shows recognition without turning it into exposition.
4. Hesitation
A closer view of Maya looking from the compass to Arun. No dialogue balloon.
Gives the reader time to register her choice.
5. Offer
Maya extends the compass. Arun does not immediately take it. “He said you would know.”
Changes the relationship and leaves a question for the next scene.
If Arun’s answer creates another important turn, add a panel to give it room. You can insert an in-between panel, reorder panels, or revise a prompt. Let the scene’s change in trust guide the sequence.
Generate, then check the details that carry the story
Generate a panel individually to test the look, or use Generate all panels after reviewing the plan. Check the faces, clothing, props, screen position, and emotional expression. Reference art and appearance descriptions guide generation, but images still need review. Regenerate a panel when the compass changes shape or a reaction communicates the wrong feeling.
Open the Character sheet to review the planned look, outfit, environment, and continuity details. A temporary wet sleeve belongs to the current story state; a permanent scar belongs to the character’s continuing identity. Saving sheet edits updates later render prompts. It does not repaint images you have already generated, so regenerate affected panels when necessary.
Letter the dialogue and compose the pages
Open the lettering editor to adjust dialogue, captions, and sound effects. Move balloon tails toward the intended speaker, keep text clear of faces and significant props, and use Save & bake when the lettering is ready. You can show the script beside the panel to compare the adaptation with the original lines.
Choose Compose the pages to arrange panels across physical pages. Use Designs as a starting point, then move and resize panels to match the scene’s rhythm. Give the reunion’s hesitation enough space to read. Our comic page layout and lettering guide walks through reading order, gutters, and dialogue placement.
Choose your versions before exporting the book
Compose and save the pages you want to include. In the version list, Use for export selects a composed version for that scene; otherwise the newest composed version is used. Open the project’s Export tab and select Comic book (PDF) to assemble the composed pages in story order.
Check the readiness counts before downloading. Scenes without composed comic pages are omitted, and archived scenes are excluded. A successful export can therefore be shorter than the screenplay. Review the PDF from first page to last for missing scenes, reading order, small text, and accidental version changes. Page size presets help prepare a layout; exporting a PDF does not publish the book to a marketplace.
Before you adapt the next scene
Keep the emotional turn. Confirm the comic shows what changes between the characters, including meaningful silent reactions.
Check recurring details. Compare the active avatar, current outfit, signature prop, and environment across neighboring scenes.
Separate correction from generation. Edit a balloon or layout directly when the art already works; regenerate when the picture itself needs to change.
Review the exported sequence. Select the intended versions and confirm every scene you want is composed.
Frequently asked questions
Can I turn an existing screenplay into a comic in SceneCraft?
Yes. Open the screenplay project, select a scene in Editor, and choose Visuals → Comic Studio. Prepare the scene’s character references, plan its panels, generate or add artwork, letter it, and compose the pages. Repeat for the scenes you want in the book.
Does one screenplay scene have to fit on one comic page?
No. Compose the pages lets you spread a scene’s panels across several physical pages. Use enough space for important actions, reactions, and readable lettering.
Can I use my own character images?
Yes. Upload your character artwork in the cast reference controls and keep an appearance description alongside it. Select the active avatar you want future comic renders to use.
Can I change the panel plan before generating artwork?
Yes. Review and edit panel prompts, change their order, and add panels before rendering. You can generate individual panels when you want to test a decision first.
Why are some scenes missing from my comic book PDF?
The export includes composed comic pages. Scenes without a composed version are omitted, and archived scenes are excluded. Check the readiness counts and compose the missing scenes before exporting again.